Exactly how to Set Up a New Commode Seat and a Heating Air duct
Fixing a Dripping Faucet: Do It Yourself Overview =================================================
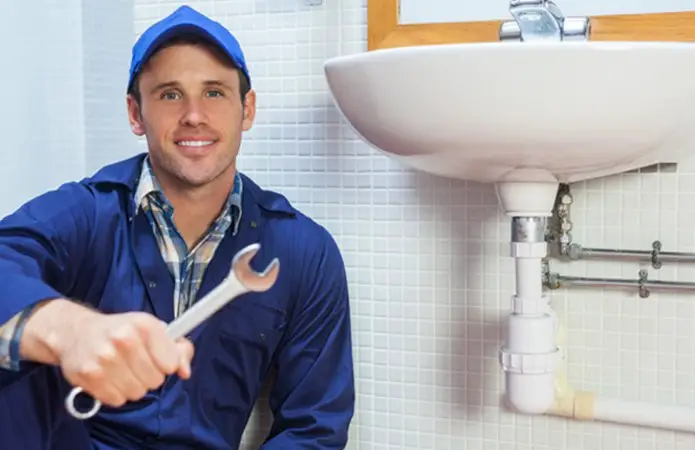
If you've ever taken care of the nuisance of a dripping faucet, you know exactly how it can interrupt your tranquility. The constant drip, drip, drip can be infuriating, in addition to the drainage and enhanced costs. Yet concern not, there's a means to tackle this issue head-on and restore tranquility to your home. By following a couple of simple actions, you can become the hero of your home and get rid of that pesky leakage permanently. So, are you ready to take fee and fix that touch finally?
Key Takeaways

- Determine faucet kind for appropriate repair: sphere, cartridge, compression, ceramic disk.
- Collect essential devices like wrench, screwdrivers, washing machines, and O-rings.
- Turn off water using sink or major shut-off shutoff.
- Dismantle faucet meticulously after shutting off water.
- Examine, pick right size, and replace worn washers promptly.
Recognizing the Sort Of Faucet
To recognize the kind of faucet, beginning by checking out the design and structure of the tap. Tap products play a pivotal function in identifying the kind of faucet you have. Typical tap materials consist of brass, stainless steel, and chrome. Each product needs certain upkeep to ensure the faucet works properly. Normal cleansing and staying clear of rough chemicals are necessary for preserving the faucet's look and performance.
Faucet style likewise gives clues about the sort of faucet you are taking care of. Different faucet designs, such as ball faucets, cartridge faucets, compression taps, and ceramic disk taps, have distinct performances. Sphere taps are typically located in older homes and are recognizable by their single deal with design. Cartridge taps make use of a cartridge to manage the water circulation and temperature. Compression faucets have different hot and cold manages that demand to be twisted to transform the water on. Ceramic disk faucets are modern and include a solitary lever for both cold and hot water control. Recognizing the faucet's design and materials is crucial for reliable repair service and maintenance.
Collecting the Necessary Tools
Evaluate your faucet thoroughly to identify the specific tools needed for the repair work process. As soon as you have recognized the type of tap, it's crucial to gather the needed devices for an effective repair. Proper device company and maintenance are essential for completing the task successfully. See to it your tools remain in excellent condition, as damaged tools can lead to crashes or inefficient repair work. Prior to using any tool, make certain you understand its security standards and right usage to stop injuries.
For repairing a leaking tap, usual tools you could require include an adjustable wrench, screwdrivers, pliers, and a washing machine and O-ring assortment. These devices will assist you take apart the tap, change any type of worn-out parts, and rebuild it properly. Keep your devices organized in a toolbox or designated area to easily access them when required. Regular device upkeep, such as cleansing and lubricating, will lengthen their lifespan and guarantee they perform effectively throughout the repair work procedure. Remember, safety needs to constantly be a priority when utilizing devices to repair your dripping tap.
Shutting down the Supply Of Water
Make sure the water supply is entirely turned off before beginning any kind of repair on the leaking faucet. To stop flooding or unanticipated leakages, situating the shut-off shutoff is important. The shut-off valve is generally located under the sink for kitchen area or bathroom faucets. Spin the shutoff clockwise to shut down the water flow entirely.
If the tap does not have a specific shut-off shutoff, you could require to shut off the major water for your home. The main shut-off valve is usually located near the water meter or where the primary water pipe enters your residence. Turn the valve clockwise until it stops to remove water to the whole building.
It is very important to confirm that the water is completely shut off by checking the faucet. Attempt turning on the tap to make certain no water is flowing. When you're particular the water system is shut off, you can proceed with confidence to fix the dripping faucet.
Taking apart the Tap
Prior to disassembling the tap, make sure that the water supply is completely shut off to stop any kind of leaks or water damages throughout the repair work process. To begin, you will certainly need a screwdriver to get rid of the screws that hold the faucet take care of in position. Once the screws are out, carefully lift the take care of off to subject the internal components.
Next off, you will see the cartridge or stem setting up inside the faucet. Make use of a wrench or pliers to very carefully divide these components from the main body of the tap. Beware not to apply way too much pressure as this might harm the faucet even more.
After separating the elements, position them on a clean surface area in the order you eliminated them. This will certainly make it simpler to reassemble the faucet later on. Inspect the parts for any kind of signs of wear or damages, which might indicate the resource of the leak. If you discover any type of broken washing machines or seals, these will certainly require to be changed in the following steps.
Evaluating and Replacing Washers
To figure out if the washing machines are triggering the leak, thoroughly assess their condition for any signs of wear or damage. Washers are essential components in a tap that help produce a water tight seal. They are commonly made from products like rubber, silicone, or steel. Common washer sizes consist of inch, 3/8 inch, and inch, so ensure you have the correct dimension when changing them.
Check the washers for any kind of fractures, tears, or deformities that may be triggering the leakage. If you see any kind of indications of wear, it's necessary to change them promptly to avoid more leakage. When picking new washing machines, pick a product that fits your needs and the sort of tap you have. Rubber washing machines are commonly made use of for standard faucets, while silicone washers are more long lasting and immune to warmth. Steel washers are suitable for durable applications. Once you have determined the problem and acquired the appropriate substitute washers, you can continue to reconstruct the faucet and test it for leaks.
Reassembling the Faucet and Evaluating
Examining and replacing the washing machines has provided you insight into the prospective source of the leak; now, rebuild the faucet and carry out a complete examination to validate the issue has actually been settled. Begin by very carefully placing the tap take care of back onto the spindle, ensuring it fits well. Use an adjustable wrench to tighten the handle, yet be cautious not to overtighten, as this could bring about trouble consequently the tap on and off.

Once the handle is firmly in position, turn the water back on and slowly open the faucet. Check for any type of indicators of leakage around the deal with or the spout. If there are no leaks, proceed to examine the water flow by changing the tap handle to different positions. Confirm the water circulation is consistent and that there are no uncommon noises coming from the tap.
Regularly Asked Concerns
Just How Can I Stop My Tap From Dripping Once Again in the Future?
To prevent your faucet from leaking once more, bear in mind upkeep pointers like checking for worn washing machines or loosened links. Usual root causes of leakages consist of over-tightening or worn out parts. Troubleshooting methods entail making certain all parts are correctly mounted and not harmed. Stay proactive by performing routine examinations and fixing problems promptly. Following these prevention strategies will assist maintain your faucet leak-free in the future.
Can I Use Choice Products if I Do Not Have the Suggested Devices?
If you don't have actually the advised tools, you can make use of improvisated options or clever choices. water heater repair near me Obtain creative and take into consideration momentary fixes to deal with the concern. Believe outside package and create some innovative options to take on the issue handy. It's all about being clever and finding methods to make it work till you can access the appropriate devices or materials.
Is It Required to Shut Off the Water for All Sorts Of Taps?
Yes, it is very important to switch off the water system for all kinds of taps. This step is essential for water conservation and protecting against possible risks. In emergency circumstances, shutting down the water can assist stay clear of flooding and damages. Remember, safety and security preventative measures such as this are simple yet efficient in keeping your home. Take the extra minute to shut off the water it's a small action that can avoid substantial issues in the future.
How Do I Know if the Tap Problem Requires Specialist Aid?
If you doubt whether to take care of a tap concern do it yourself or call a professional, take into consideration a couple of fixing pointers. Beginning by checking if the issue appears straightforward, like a loosened or worn washing machine. If you fit with basic devices and jobs, you could be able to fix it yourself. Nonetheless, if the trouble is complicated, including specialized parts or devices, it's finest to look for specialist aid to make certain the work is done appropriately.
What Should I Do if the Tap Continues to Drip After Repair?
If the tap keeps dripping post-repair, attempt different securing techniques or repair for underlying concerns. Consider temporary solutions while you deal with the source. Stay clear of common errors like overtightening or making use of inaccurate components. Explore different techniques until you find the one that functions. Keep in mind, persistence and patience are essential when dealing with consistent leaks.